auto post youtube videos to facebook page (4X Faster!)
In today’s digital landscape, where kids are practically born with a tablet in hand, platforms like YouTube and Facebook are integral to their online experiences.
According to a recent study by Common Sense Media, kids aged 8-12 spend an average of 5 hours a day consuming media, and a significant portion of that time is spent on video platforms.
As content creators, we have a huge responsibility to shape their online environment.
We’re not just making videos; we’re influencing interests, behaviors, and even their understanding of the world.
Effectively reaching this young audience can lead to greater impact and engagement.
But here’s the catch: time is our most precious resource.
That’s where auto-posting comes in.

This article is your ultimate guide to automating the process of posting your YouTube videos to your Facebook page, saving you time and letting you focus on what you do best: creating awesome content.
I’m going to walk you through the why, the how, and the best practices for auto-posting so you can reach your audience four times faster and leave the manual labor behind.
Let’s dive in!
Section 1: Understanding the Importance of Cross-Platform Sharing
1. The Digital Landscape for Kids in 2025
The media landscape for kids is constantly evolving.
It’s no longer just about Saturday morning cartoons.
Kids today are digital natives, navigating YouTube, Facebook, TikTok, and more with ease.
According to Statista, YouTube has over 2.5 billion monthly active users globally, with a substantial portion being children.
Facebook, while often perceived as a platform for older demographics, still boasts a massive user base, and many parents use it to discover and share content their kids will enjoy.
Having a multi-platform presence is no longer optional; it’s essential.
By being present on both YouTube and Facebook, you’re increasing your chances of reaching a wider audience, boosting your visibility, and building a stronger brand.
2. Benefits of Auto Posting
Let’s be real: manually posting every video to Facebook after it goes live on YouTube is a drag.
It’s time-consuming and, frankly, boring.
Auto-posting eliminates this tedious task, freeing you up to focus on more important things, like brainstorming new video ideas, engaging with your audience, or, you know, actually having a life!
But the benefits go beyond just saving time.
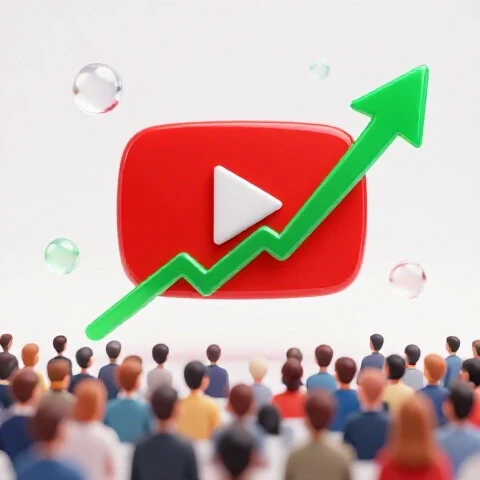
Auto-posting can also enhance your visibility and engagement.
By consistently sharing your content across platforms, you’re increasing your chances of being seen by new viewers and re-engaging existing fans.
Furthermore, Facebook’s algorithm favors content that is consistent and engaging.
By auto-posting regularly, you’re signaling to the algorithm that your page is active and relevant, which can lead to increased reach and visibility in users’ newsfeeds.
Think of it as giving the algorithm a little nudge in the right direction.
3. The Role of Facebook in Engaging Young Audiences
While YouTube is the go-to platform for video content, Facebook offers unique opportunities for community building and interaction.
It allows you to connect with parents and families on a more personal level.
Facebook Groups, for example, can be a powerful tool for building a community around your content.
You can create a group specifically for your fans, where they can share their thoughts, ask questions, and connect with each other.
You can also use Facebook Events to promote upcoming videos or live streams, and even host virtual meet-and-greets with your audience.
Moreover, Facebook allows for different types of engagement than YouTube.
Parents are more likely to share your videos with their friends and family on Facebook, leading to organic growth and increased visibility.
Facebook also allows you to easily run contests and giveaways, which can be a great way to boost engagement and attract new followers.
In short, Facebook complements YouTube content by providing a platform for deeper engagement and community building, ultimately amplifying your reach and impact.
Section 2: Setting Up for Success
1. Choosing the Right Tools
Okay, now let’s get practical.
To automate your posting process, you’ll need the right tools.
Several options are available, each with its own strengths and weaknesses.
Here are a few popular choices:
Zapier: This is a powerful automation platform that connects various apps and services.
You can create “Zaps” that automatically post your YouTube videos to Facebook whenever a new video is uploaded.
Zapier offers a free plan with limited functionality, as well as paid plans with more features and higher usage limits.IFTTT (If This Then That): Similar to Zapier, IFTTT allows you to create applets that automate tasks.
It’s generally considered to be more user-friendly than Zapier, but it may not offer as many advanced features.
IFTTT also offers a free plan with limited functionality, as well as a paid Pro plan.Buffer: While primarily a social media scheduling tool, Buffer also offers auto-posting capabilities.
It allows you to schedule posts in advance and track your performance.
Buffer offers a free plan for managing a limited number of social media accounts, as well as paid plans with more features and higher usage limits.Hootsuite: Another popular social media management platform, Hootsuite offers a wide range of features, including auto-posting, scheduling, and analytics.
It’s a more robust solution than Buffer, but it can also be more expensive.
When choosing a tool, consider your budget, technical expertise, and specific needs.
Do you need advanced features like custom scheduling and analytics?
Or are you looking for a simple, user-friendly solution?
I personally started with IFTTT because of its simplicity.
It’s a great way to dip your toes into the automation world.
But as my needs grew, I switched to Zapier for its more robust features and integrations.
2. Creating a Facebook Page for Your Content
Before you can start auto-posting, you’ll need a Facebook page for your content.
Here’s a step-by-step guide to setting one up:
- Log in to Facebook: If you don’t have a Facebook account, you’ll need to create one.
- Create a Page: Click on the “+” icon in the top right corner of the screen and select “Page.”
- Choose a Page Category: Select the category that best describes your content.
“Video Creator” or “Public Figure” are good options. - Enter Page Information: Enter your page name, a brief description, and a website (if you have one).
Make sure your page name aligns with your YouTube channel name to maintain brand consistency. - Add a Profile Picture and Cover Photo: Choose a profile picture and cover photo that are visually appealing and representative of your brand.
Use high-quality images that are properly sized for Facebook. - Add a Call-to-Action Button: Add a call-to-action button (e.g., “Subscribe,” “Watch Now”) to encourage visitors to take a specific action.
- Customize Your Page: Add additional information about your channel, such as your mission statement, target audience, and contact information.
Once your page is set up, it’s important to create a content calendar to plan your posts in advance.
This will help you stay organized and ensure that you’re consistently sharing valuable content with your audience.
I use Google Calendar for this, it’s simple and easy to share with my team.
3. Linking YouTube to Facebook
Now for the magic!
Linking your YouTube and Facebook accounts is the key to seamless auto-posting.
Here’s how to do it using Zapier:
- Create a Zapier Account: If you don’t already have one, sign up for a Zapier account.
- Create a New Zap: Click on the “Create Zap” button.
- Choose a Trigger App: Search for and select “YouTube” as the trigger app.
- Choose a Trigger Event: Select “New Video in Channel” as the trigger event.
- Connect Your YouTube Account: Connect your YouTube account to Zapier.
You’ll need to grant Zapier permission to access your YouTube channel. - Choose an Action App: Search for and select “Facebook Pages” as the action app.
- Choose an Action Event: Select “Create Page Post” as the action event.
- Connect Your Facebook Account: Connect your Facebook account to Zapier.
You’ll need to grant Zapier permission to access your Facebook page. - Customize Your Post: Customize the content of your Facebook post.
You can use data from the YouTube video, such as the title, description, and thumbnail, to create an engaging post. - Test Your Zap: Test your zap to make sure it’s working correctly.
- Turn on Your Zap: Once you’re satisfied with your zap, turn it on to start auto-posting your YouTube videos to Facebook.
The process is similar for IFTTT and other automation tools.
Just follow the instructions provided by the tool and make sure to grant the necessary permissions.
Important Note: Pay close attention to the permissions you grant to Zapier and other third-party apps.
Only grant the minimum necessary permissions to protect your privacy and security.
Section 3: Automation Strategies for 4X Faster Posting
1. Utilizing Automation Tools
Now that you’ve chosen your tool and linked your accounts, let’s dive deeper into how to utilize automation effectively.
The key is to customize your automation to fit your specific needs and goals.
For example, you can use Zapier to automatically add a specific hashtag to your Facebook post, such as #KidsContent or #EducationalVideos.
This will help your content be discovered by users who are interested in those topics.
You can also use Zapier to schedule your posts in advance.
This is especially useful if you want to post your videos at specific times of the day or on specific days of the week.
For example, you might want to schedule your posts for the afternoons, when kids are more likely to be online.
Here’s an example of how to customize your Zap in Zapier:
- Step 1: After selecting “Create Page Post” as the action event, you’ll see a section where you can customize the message.
- Step 2: In the “Message” field, you can use data from your YouTube video, such as the title and description.
For example, you can write: “New video alert!
Check out my latest video on [YouTube Video Title]: [YouTube Video Description] #KidsContent #EducationalVideos” - Step 3: You can also add a link to your YouTube video by using the “Video URL” field.
- Step 4: In the “Picture URL” field, you can add a link to your YouTube video’s thumbnail to make your Facebook post more visually appealing.
2. Optimal Posting Times
Timing is everything, especially on social media.
To maximize engagement, you need to post your videos when your audience is most active on Facebook.
While there’s no one-size-fits-all answer to the question of optimal posting times, there are some general guidelines you can follow.
According to various studies, the best times to post on Facebook are typically between 1 PM and 4 PM on weekdays.
However, the best way to determine the optimal posting times for your audience is to analyze your Facebook Insights.
Facebook Insights provides detailed data about your audience, including their demographics, interests, and online activity patterns.
To access your Facebook Insights, go to your Facebook page and click on the “Insights” tab.
Then, click on the “Posts” tab to see data about when your fans are online.
This data will help you identify the days and times when your audience is most active on Facebook.
Once you’ve identified the optimal posting times, you can adjust your automation settings to schedule your posts accordingly.
3. Crafting Engaging Captions and Thumbnails
A captivating caption and thumbnail are essential for grabbing attention on Facebook.
Remember, you’re competing with countless other posts in users’ newsfeeds, so you need to make your content stand out.
Here are some tips for crafting engaging captions:
- Keep it short and sweet: Facebook users are often scrolling quickly, so keep your captions concise and to the point.
- Ask a question: Asking a question can encourage users to engage with your post and leave a comment.
For example, you could ask: “What’s your favorite part of the video?” - Use emojis: Emojis can add personality and visual appeal to your captions.
- Include a call to action: Tell users what you want them to do, such as “Watch the video now!” or “Share this with your friends!”
Here are some tips for creating eye-catching thumbnails:
- Use bright colors: Bright colors are more likely to grab attention in users’ newsfeeds.
- Include text: Add text to your thumbnail to clearly communicate the topic of your video.
- Use a high-quality image: Make sure your thumbnail is clear and sharp.
- Keep it consistent: Use a consistent style for your thumbnails to create a recognizable brand.
I personally use Canva to create my thumbnails.
It’s a user-friendly design tool with tons of templates and graphics to choose from.
4. Testing and Tweaking Your Automation
Automation is not a “set it and forget it” solution.
You need to monitor the performance of your auto-posted content and make adjustments as needed.
Pay attention to metrics like reach, engagement, and click-through rate.
Are your posts getting the attention you want?
Are users clicking on the link to watch your videos on YouTube?
If you’re not seeing the results you want, experiment with different captions, thumbnails, and posting times.
Try A/B testing different variations to see what works best.
Don’t be afraid to tweak your automation settings to optimize your performance.
The key is to be flexible and adapt to the changing needs of your audience.
Section 4: Engaging with Your Audience
1. Building a Community
Auto-posting is just the first step.
To truly leverage the power of Facebook, you need to actively engage with your audience and build a community around your content.
Respond to comments and messages promptly.
Ask questions and encourage discussion.
Create polls and quizzes to get your audience involved.
Run contests and giveaways to reward your loyal fans.
Offer exclusive content or early access to new videos for your Facebook followers.
The more you engage with your audience, the more likely they are to become loyal fans and advocates for your brand.
2. Using Facebook Live and Stories
Facebook Live and Stories are powerful tools for connecting with your audience in real-time.
Use Facebook Live to host Q&A sessions, behind-the-scenes tours, or live performances.
Promote your upcoming videos or live streams on Facebook Stories to generate excitement and anticipation.
Create interactive content that resonates with children.
For example, you could host a live drawing session or a virtual sing-along.
Facebook Live and Stories are a great way to add a personal touch to your content and build a stronger connection with your audience.
3. Adapting Content for Facebook
While you can simply auto-post your YouTube videos to Facebook, it’s often more effective to adapt your content for the platform.
Consider the different audience and platform dynamics.
Facebook users are often looking for shorter, more digestible content.
Create shorter versions of your YouTube videos specifically for Facebook.
Add captions to your videos to make them more accessible to users who are watching without sound.
Use Facebook’s built-in video editing tools to add text, graphics, and music to your videos.
By adapting your content for Facebook, you can increase engagement and reach a wider audience.
Conclusion
Auto-posting your YouTube videos to Facebook is a game-changer for content creators targeting children.
It saves you time, increases your visibility, and helps you build a stronger community.
By choosing the right tools, setting up your Facebook page, and utilizing effective automation strategies, you can reach your audience four times faster and focus on what you do best: creating amazing content.
Embrace automation as a means to enhance your productivity and impact in 2025.
The future of content creation is all about working smarter, not harder.
Now go out there and create some awesome videos!