Best Format for YouTube | Premiere Pro (4 Pro Secrets!)
Let’s face it: creating YouTube content isn’t just a hobby anymore.
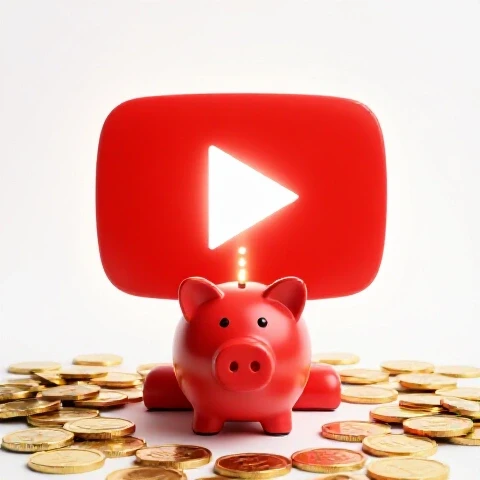
It’s an investment – an investment in your brand, your future, and potentially, your financial freedom.
With over 2.5 billion monthly active users (Statista, 2024), YouTube is a powerhouse.
The potential reach and revenue opportunities for creators are staggering.
But let’s be real, the competition is fierce.
So, how do you stand out in a sea of videos?
The secret lies in mastering the technical aspects, especially choosing the right format and using the right tools.
Trust me, the quality of your content isn’t just about what you say, but how you present it.

That’s where Adobe Premiere Pro comes in.
This isn’t just another editing software; it’s a creator’s best friend.
It gives you the power to polish your videos, optimize them for YouTube, and ultimately, maximize your impact.
In this article, I’m going to pull back the curtain and reveal four pro secrets that will completely transform how you approach video production.
These aren’t just theoretical tips; they’re practical strategies that you can implement right away using Premiere Pro.
By 2025, these strategies will be vital for any serious content creator.
Ready to level up?
Let’s dive in!
Section 1: Understanding YouTube Formats
YouTube isn’t a one-size-fits-all platform.
It’s an ecosystem of diverse content, each catering to different audiences and consumption habits.
Understanding these formats is crucial for crafting a winning strategy.
Shorts: These vertical videos are YouTube’s answer to TikTok and Instagram Reels.
They’re designed for quick consumption on mobile devices.
- Advantages: High discoverability due to the Shorts feed algorithm, potential for viral reach, and easy to create.
- Disadvantages: Monetization can be tricky (although YouTube is improving this), shorter watch times might not boost overall channel metrics as much, and require a different content strategy.
Standard Videos: These are the traditional, longer-form videos that most people associate with YouTube.
- Advantages: Greater depth of content, better monetization opportunities (especially with mid-roll ads), and stronger audience connection.
- Disadvantages: Require more planning, production, and editing time, harder to get discovered initially compared to Shorts.
Live Streams: These are real-time broadcasts that allow for direct interaction with your audience.
- Advantages: High engagement, builds community, and can be monetized through Super Chat and channel memberships.
- Disadvantages: Requires strong on-camera presence, technical setup can be challenging, and unpredictable audience behavior.
So, which format should you choose?
It depends on your goals and target audience.
If you’re looking for quick growth and viral potential, Shorts are a great option.
If you want to build a loyal audience and generate substantial revenue, standard videos are the way to go.
Live streams are excellent for engaging with your existing community and fostering a sense of connection.
Case Study: MrBeast vs. Kurzgesagt – In a Nutshell
MrBeast thrives on high-energy, attention-grabbing standard videos with elaborate stunts and giveaways.
This keeps viewers hooked for extended periods, maximizing watch time and ad revenue.
Kurzgesagt, on the other hand, creates beautifully animated, informative videos that break down complex topics.
Their success lies in the high production value and the unique way they present information, making learning engaging and accessible.
Trending Formats in 2025
I predict that in 2025, we’ll see a rise in interactive videos, personalized content, and AI-driven content creation.
Creators who can adapt to these trends will have a significant advantage.
Section 2: Premiere Pro Essentials for YouTube Content
Adobe Premiere Pro is the industry-standard video editing software.
It’s used by professionals and amateurs alike, and for good reason.
It’s powerful, versatile, and packed with features that can take your YouTube content to the next level.
Why Premiere Pro?
- Industry Standard: It’s what the pros use.
Learning Premiere Pro opens doors to professional opportunities. - Versatility: It can handle any type of video, from simple vlogs to complex cinematic productions.
- Integration: It seamlessly integrates with other Adobe Creative Cloud apps like Photoshop and After Effects.
Key Features for YouTube Editing:
- Multi-cam Editing: Easily switch between multiple camera angles to create dynamic and engaging videos.
- Color Correction Tools: Make your videos look polished and professional with advanced color grading.
- Audio Editing Capabilities: Clean up audio, add music and sound effects, and create a professional-sounding mix.
- Motion Graphics Templates (MOGRTs): Add professional-looking titles, lower thirds, and animations with ease.
Setting Up Your Project for YouTube:
- Aspect Ratio: 16:9 is the standard aspect ratio for YouTube videos.
- Resolution: 1920×1080 (1080p) is the minimum recommended resolution. 4K (3840×2160) is becoming increasingly popular.
- Frame Rate: 24fps, 25fps, 30fps, or 60fps are all acceptable.
Choose a frame rate that matches your shooting style and content. - Export Settings: Use the H.264 codec and a bitrate of 10-12 Mbps for 1080p videos, and 35-45 Mbps for 4K videos.
Section 3: Pro Secret #1: Advanced Editing Techniques
This is where the magic happens.
Advanced editing techniques aren’t just about making your videos look pretty; they’re about enhancing storytelling and keeping viewers engaged.
Jump Cuts: These are abrupt transitions between shots that create a sense of energy and immediacy.
They’re great for cutting out pauses and filler words, and for speeding up the pace of your videos.
B-Roll Integration: B-roll is supplemental footage that supports your main narrative.
It can be anything from scenic shots to close-ups of objects.
B-roll adds visual interest and helps to break up long stretches of talking head footage.
Graphics and Animations: Adding graphics and animations can make your videos more informative and engaging.
Use them to highlight key points, illustrate concepts, and add visual flair.
How to Execute These Techniques in Premiere Pro:
- Jump Cuts: Simply cut out the unwanted sections of your footage and drag the remaining clips together.
Use a subtle crossfade transition to smooth out the transition. - B-Roll Integration: Import your B-roll footage into Premiere Pro and drag it onto the timeline above your main footage.
Use the opacity controls to blend the B-roll with your main footage. - Graphics and Animations: Create graphics and animations in Adobe After Effects and import them into Premiere Pro as Dynamic Links.
This allows you to easily update your graphics and animations without having to re-render your entire video.
Section 4: Pro Secret #2: Crafting Compelling Thumbnails and Titles
Think of your thumbnail and title as your video’s storefront.
They’re the first thing people see, and they’re what will determine whether or not someone clicks on your video.
Psychology Behind Effective Thumbnails and Titles:
- Color Theory: Use bright, contrasting colors to grab attention.
- Text Readability: Use clear, concise text that is easy to read at a glance.
- Emotional Triggers: Use images and words that evoke emotion, such as curiosity, excitement, or fear.
Designing Thumbnails in Premiere Pro:
While Premiere Pro isn’t primarily a graphic design tool, you can still use it to create basic thumbnails.
- Export a Frame: Choose a visually interesting frame from your video and export it as a JPEG or PNG image.
- Add Text: Use the text tool to add a title or keyword to your thumbnail.
- Adjust Colors: Use the color correction tools to enhance the colors and contrast of your thumbnail.
Examples of Effective Thumbnails and Titles:
Look at successful creators in your niche and analyze their thumbnails and titles.
What colors do they use?
What fonts do they use?
What emotions do they evoke?
For example, a thumbnail from Ali Abdaal often features his face with an exaggerated expression, bright colors, and concise text highlighting the video’s main benefit.
This combination creates curiosity and encourages viewers to click.
Section 5: Pro Secret #3: Leveraging Analytics for Continuous Improvement
YouTube Analytics is your secret weapon.
It provides valuable insights into how your videos are performing, allowing you to refine your content strategy and optimize your videos for maximum impact.
Key Metrics to Focus On:
- Watch Time: This is the total amount of time that viewers spend watching your videos.
It’s a key ranking factor on YouTube. - Click-Through Rate (CTR): This is the percentage of people who click on your video after seeing the thumbnail and title.
A high CTR indicates that your thumbnails and titles are effective. - Audience Retention: This is the percentage of viewers who watch your video from beginning to end.
A high audience retention rate indicates that your content is engaging and keeps viewers hooked.
How Premiere Pro Can Help:
- Adjusting Pacing: If your audience retention drops off at a certain point in your video, consider speeding up the pacing or cutting out unnecessary segments.
- Re-editing Segments: If a particular segment of your video is not performing well, consider re-editing it or replacing it with something else.
- A/B Testing Thumbnails and Titles: Create multiple versions of your thumbnail and title and use YouTube’s A/B testing feature to see which ones perform best.
Case Study: How PewDiePie Used Analytics to Revitalize His Channel
PewDiePie, one of YouTube’s biggest stars, has openly discussed using analytics to understand what his audience wants.
By analyzing watch time and audience retention, he identified trends in the types of videos that resonated most with his viewers, leading to a revamp of his content strategy and a resurgence in popularity.
Section 6: Pro Secret #4: Collaboration and Networking
YouTube is a community, and collaboration is key to growth.
Partnering with other creators can expose your channel to a wider audience, increase your reach, and build valuable relationships.
How Premiere Pro Facilitates Collaboration:
- Shared Projects: Premiere Pro allows you to easily share projects with other editors, making it easy to collaborate on videos remotely.
- Collaborative Editing: Multiple editors can work on the same project simultaneously, streamlining the editing process.
Strategies for Finding and Reaching Out to Potential Collaborators:
- Identify Creators in Your Niche: Look for creators who have a similar audience and content style to you.
- Engage with Their Content: Leave thoughtful comments on their videos and engage with them on social media.
- Create Compelling Proposals: When you reach out to a potential collaborator, be clear about what you’re offering and what you hope to gain from the collaboration.
Success Story: How Dude Perfect Grew Through Collaboration
Conclusion
Creating quality YouTube content is an investment, and applying these four pro secrets can yield substantial returns.
By understanding YouTube formats, mastering Premiere Pro, and leveraging advanced editing techniques, compelling thumbnails, analytics, and collaboration, you can transform your approach to video production and position yourself for success in 2025 and beyond.
I encourage you to take actionable steps using the insights gained from this article.
Start experimenting with different editing techniques, analyzing your analytics, and reaching out to potential collaborators.
The key is to continuously learn and adapt to the ever-evolving landscape of YouTube.
Embrace these strategies, and you’ll be well on your way to becoming a leader in the content creation space.
Now go out there and create something amazing!