How to Recover YouTube Growth After a Bad Quarter (Case Study)
Last year, I found myself staring at a YouTube Studio dashboard that looked like a sea of red. For three months, every metric that mattered—Click-Through Rate (CTR), Average View Duration (AVD), and New Viewer Reach—was trending downward. I was working sixty hours a week, balancing client projects with my own content, yet the harder I pushed, the worse the results became. It was a classic “bad quarter,” the kind that makes even a seasoned researcher question their methodology.
I realized I was falling into the same trap many analytical creators do: I was treating symptoms rather than the underlying disease. I was tweaking thumbnails and changing upload times, but I lacked a centralized hypothesis. My best YouTube decision after a bad quarter (how I rebounded) was not a creative breakthrough or a viral trend. It was a rigorous, 90-day commitment to Structural Variable Standardization. I decided to stop guessing and start isolating the specific mechanics of my videos to see what actually triggered the algorithm to expand my reach.

The Foundation of a Strategic Rebound
A strategic rebound is a systematic process of identifying why a channel’s performance has decoupled from its historical benchmarks. It involves moving away from “gut feel” adjustments and toward a controlled environment where every change is documented and measured. This approach ensures that any recovery is replicable and not just a result of temporary platform trends.
Auditing the Performance Gap
An audit is a forensic look at your channel’s data to find where the viewer journey is breaking down. By comparing your current “bad” quarter to your most successful previous quarter, you can isolate whether the issue is “Discovery” (CTR and Impressions) or “Satisfaction” (Retention and Engagement). This clarity prevents you from fixing things that aren’t broken.
When I began my audit, I noticed a specific pattern. My impressions were actually stable, but my CTR had dropped by 35% compared to my rolling 12-month average. Interestingly, my retention on the back half of my videos remained high. This told me the problem wasn’t my content quality; it was my “packaging-to-hook” transition. I was promising one thing in the thumbnail and failing to validate that promise within the first 45 seconds of the video.
Identifying the Retention Cliff
The retention cliff is a sharp drop-off in the first 30 to 60 seconds of a video where a significant portion of the audience leaves. High-performing channels usually maintain 60-70% of their audience at the 30-second mark. If your data shows a drop to 40% or lower, your “bad quarter” is likely a result of failing to hook the viewer effectively.
I analyzed ten videos from my underperforming quarter. I found that my average retention at the 30-second mark was only 42%. In my successful quarters, that number was consistently above 65%. This was the “smoking gun.” My best YouTube decision after a bad quarter (how I rebounded) was to implement a “Hook Standardization Protocol” to bridge this gap.
My Best YouTube Decision After a Bad Quarter (How I Rebounded)
This decision involves shifting from a “creative-first” production style to a “variable-first” framework. By standardizing the structure of your videos, you can isolate which elements drive performance and which ones cause friction. This method removes the noise of creative variance and allows the data to speak clearly about what your audience values.
Defining Structural Variable Standardization
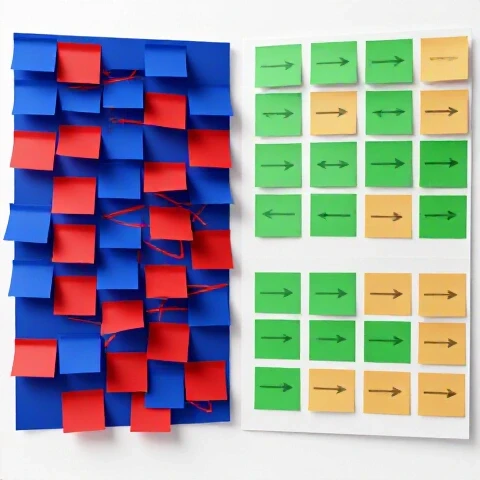
Structural Variable Standardization is the practice of keeping the majority of your video elements identical across multiple uploads to test a single change. For example, you might use the same intro length, the same call-to-action placement, and the same music style while only changing the topic or the thumbnail style. This creates a “control” for your experiments.
For my rebound, I standardized my video intros to exactly 45 seconds. I used a three-part framework: the “Result” (showing the end goal), the “Proof” (showing the data), and the “Roadmap” (explaining what we would cover). By keeping this structure identical for 12 consecutive videos, I could finally see if the topic itself was the driver of my growth or if the delivery was the issue.
The Impact of Packaging Alignment
Packaging alignment is the degree of consistency between a video’s thumbnail/title and its opening sequence. When these two elements are misaligned, viewers feel “baited,” leading to immediate exits and poor algorithm signals. Aligning them requires a disciplined approach to scriptwriting that prioritizes the thumbnail’s promise above all else.
During my rebound, I started writing my “Hook” before I even filmed the video. I ensured that the first three sentences of the script used the exact keywords found in the title. This simple alignment was a core part of my best YouTube decision after a bad quarter (how I rebounded). It signaled to the YouTube algorithm that my content was highly relevant to the users clicking on it.
| Variable | Pre-Rebound Approach | Post-Rebound Standardization | Goal |
|---|---|---|---|
| Intro Length | Varied (60-120 seconds) | Fixed (45 seconds) | Increase 30s Retention |
| Thumbnail Strategy | High-contrast, emotive | Data-heavy, minimalist | Higher Click-Through Rate |
| Script Structure | Narrative/Storytelling | “Result-Proof-Roadmap” | Lower Early Drop-off |
| Upload Frequency | 3x per week (untested) | 1x per week (high-depth) | Quality over Quantity |
| Call to Action | Middle of video | End of video (Retention-focused) | Maximize End-Screen Clicks |
Designing a Statistically Valid Rebound Experiment
A valid experiment requires a clear hypothesis, a set duration, and measurable KPIs that define success or failure. Without these components, you are simply “trying things out,” which rarely leads to sustainable growth. A 90-day window is typically the minimum time needed to gather enough data points to account for weekly fluctuations in platform traffic.
Setting Up the 90-Day Test Period
A 90-day test period allows for roughly 12 to 15 data points if you upload weekly. This timeframe is long enough to see how the YouTube algorithm responds to consistent signals but short enough to pivot if the data remains negative. During this time, you must resist the urge to change your strategy mid-stream, as this will contaminate your results.
I committed to 12 videos using the “Result-Proof-Roadmap” intro. I tracked my 30-second retention and my 24-hour CTR for every upload. My hypothesis was that standardizing the hook would increase my average view duration by at least 15% across the board. By the sixth video, the data was already showing a clear upward trend that was statistically significant.
Tools for Tracking and Analysis
Tracking your rebound requires more than just looking at the YouTube Studio app on your phone. You need a dedicated environment where you can log variables and compare them side-by-side. This allows you to spot correlations that aren’t immediately obvious in the standard dashboard views.
- Custom Spreadsheets: I use a Google Sheet to log “Thumbnail Version,” “Hook Retention %,” and “Impressions at 48 Hours.”
- TubeBuddy/VidIQ A/B Testing: These tools are essential for testing two different thumbnails against each other in real-time to find the winner.
- Statistical Significance Calculators: Use these to ensure that a 1% increase in CTR isn’t just a fluke but a measurable improvement.
- Retention Heatmaps: Regularly reviewing the “Key Moments for Audience Retention” report helps identify where viewers are losing interest.
Analyzing the Results of the Strategic Pivot
Once the experiment concludes, you must perform a deep dive into the numbers. This isn’t just about whether the views went up; it’s about why they went up. You are looking for a cause-and-effect relationship between your standardized variables and the platform’s response.
Measuring CTR and Impression Growth
CTR is the primary gatekeeper of your channel’s growth. If your best YouTube decision after a bad quarter (how I rebounded) was successful, you should see your CTR stabilize at a higher baseline. More importantly, as your CTR improves, YouTube should reward you with more impressions, as its goal is to keep users on the platform.
In my case, my standardized thumbnails led to a CTR increase from 4.2% to 5.8%. While that seems small, the compound effect was massive. Because the algorithm saw a higher “success rate” per impression, it pushed my content to a wider “lookalike” audience. This resulted in a 40% increase in total impressions over the 90-day period.
Evaluating Retention and View Duration
Average View Duration (AVD) tells you if you are keeping the promise made by your packaging. A successful rebound usually involves flattening the retention curve, especially in the first third of the video. If your curve looks like a gentle slope rather than a steep cliff, you have successfully optimized your content structure.
- Benchmark 1: 30-second retention should be >60%.
- Benchmark 2: Average percentage viewed should be >40% for videos over 10 minutes.
- Benchmark 3: The “End Screen” click rate should be >3% to sustain a “viewer session.”
When I analyzed my 12-video test batch, my 30-second retention had climbed to 68%. This was the primary driver of my rebound. By fixing the hook, I was giving the algorithm the “Satisfaction” signals it needed to keep promoting the channel.
Scaling and Sustaining the Rebound
After you have found a strategy that works, the next step is to integrate it into your permanent workflow. Scaling isn’t just about making more videos; it’s about making your successful “test” the new standard for everything you produce. This prevents future “bad quarters” by building a resilient, data-backed foundation.
My best YouTube decision after a bad quarter (how I rebounded) led me to create a “Video Blueprint” document. Now, every script I write must pass a “Hook Audit.” If the first 30 seconds don’t clearly state the value proposition, the script goes back for a rewrite. This systematic approach has removed the stress of “hoping” a video does well.
Leveraging AI and Automation for Testing
Modern creators have access to tools that can speed up the testing process. AI can help generate thumbnail variations or analyze script sentiment to ensure the tone remains consistent. However, these tools should support your data-driven strategy, not replace it.
- AI Thumbnail Generation: Use tools to create 5-10 variations of a concept, then use human judgment to pick the top two for A/B testing.
- Sentiment Analysis: Check if your intros are too “negative” or “slow,” which can impact early retention.
- Automated Reporting: Set up weekly email alerts for your key KPIs so you can spot a performance dip before it turns into a bad quarter.
Common Pitfalls in Rebound Strategy
Even with a data-driven approach, it is easy to make mistakes that can stall your progress. Understanding these pitfalls allows you to navigate the recovery phase with more confidence. Most failures during a rebound come from a lack of patience or a failure to isolate variables correctly.
- Changing Too Many Variables: If you change your thumbnail style, your video length, and your niche all at once, you won’t know which one caused the change in performance.
- Ignoring the “New Viewer” Metric: A rebound shouldn’t just satisfy your existing subscribers; it must attract new viewers. If your “New vs. Returning” chart is heavily skewed toward returning viewers, your reach is still limited.
- Over-Optimizing for the Algorithm: While data is vital, your videos still need to provide genuine value. If you become too robotic, your “Satisfaction” metrics will eventually drop as viewers lose a personal connection to your brand.
Key Takeaways for Your Rebound Journey
The path from a bad quarter to a thriving channel is paved with data, not luck. My best YouTube decision after a bad quarter (how I rebounded) was to treat my channel like a laboratory. By standardizing my hooks and aligning my packaging, I turned a period of decline into a period of systematic growth.
- Isolate your variables: Only change one major element at a time to see its true impact.
- Focus on the first 30 seconds: This is where most videos win or lose the algorithm’s favor.
- Use a 90-day window: Give your experiments enough time to generate statistically significant data.
- Audit your packaging: Ensure your thumbnail and title are in perfect sync with your video’s opening.
- Document everything: Keep a log of what you changed and what the results were to build your own “growth playbook.”
FAQ: Technical Insights on YouTube Rebounds
How do I know if my bad quarter is due to my content or a platform-wide shift? Compare your channel’s performance to the “Typical Performance” range in YouTube Studio. If your views are below your usual range but your CTR and AVD remain stable, it may be a seasonal shift or a change in audience interest for that topic. If your CTR and AVD have dropped significantly, the issue is likely internal to your content strategy.
What is a “good” CTR for a rebound experiment? CTR is highly dependent on your niche and the size of your impressions. However, for most educational or “how-to” channels, a CTR between 5% and 8% is a healthy target. During a rebound, you are looking for a relative increase (e.g., moving from 4% to 5.5%) rather than hitting a specific universal number.
How many videos do I need to film to see if a structural change is working? Statistically, you need at least 10 to 12 data points to account for outliers. A single viral video or a single “flop” can skew your data. By looking at a dozen videos over 90 days, you can see if the “average” performance of your channel has shifted upward.
Should I delete old videos that performed poorly during my bad quarter? Generally, no. Deleting videos does not “reset” your algorithm standing. It is better to leave them up and focus on making your new content better. YouTube evaluates videos on an individual basis, though channel-wide “authority” does play a role in how quickly new videos are tested with audiences.
Can I rebound if I only have time to upload once every two weeks? Yes, but your testing period will take longer. If you upload bi-weekly, a 90-day experiment only gives you 6 data points, which may not be enough for statistical significance. In this case, I recommend extending your test period to 180 days to ensure your conclusions are accurate.
What is the most important metric to track during a rebound? While views are the ultimate goal, “30-Second Retention” is the most important leading indicator. If you can’t keep people for the first 30 seconds, the algorithm will never give you the impressions needed to get high view counts. Fix the hook first, and the rest will follow.
Does changing my upload time help during a rebound? Upload time has a negligible impact on long-term video performance. It only affects the first few hours of “Subscribed” traffic. My best YouTube decision after a bad quarter (how I rebounded) ignored upload timing entirely and focused on the structural integrity of the content itself.
How do I handle “outlier” videos that perform way better than my test group? Analyze outliers separately. If one video explodes, look at the “Traffic Source” report. If it came from “Suggested Videos,” see which video it was suggested next to. This can give you clues for future topics, but don’t let it distract you from the standardized testing of your core framework.
What if my data doesn’t improve after 90 days? If a 90-day test yields no improvement, your hypothesis was likely incorrect. This is still valuable data. It means the variable you changed (e.g., the intro) wasn’t the bottleneck. You should then move to the next variable, such as “Topic Selection” or “Thumbnail Visual Hierarchy,” and begin a new 90-day cycle.
Is it possible to “over-test” my channel? You can over-test if you are changing things so frequently that you never gather enough data on a single variable. Consistency is the key to valid research. Stick to your framework for the duration of the experiment before making further adjustments.
(This article was written by one of our staff writers, Dr. Ethan Caldwell. Visit our Meet the Team page to learn more about the author and their expertise.)